

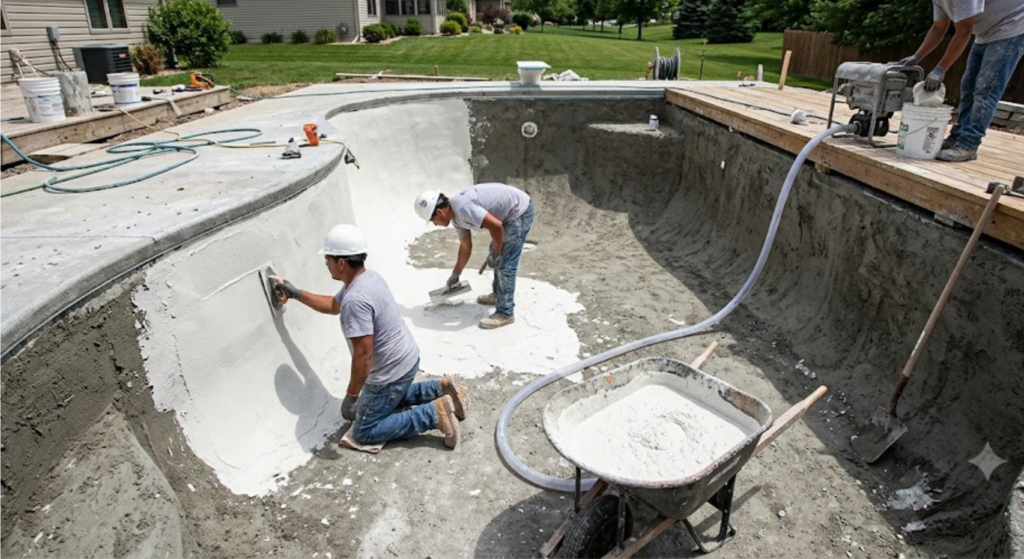
A swimming pool is the centerpiece of outdoor living in Central Texas, providing relief during long hot summers and serving as a focal hub for family gatherings. However, over time, constant exposure to pool chemicals, sun, and changing weather takes its toll on your pool’s interior surface. Rough spots, staining, chipping, or fading mean it is time for a professional resurfacing project.
Whether you are updating an older backyard oasis or putting the finishing touches on a newly constructed pool, plastering is the most crucial step in achieving a watertight, smooth, and vibrant finish. From prep to curing, Clear Solutions breaks down the pool plastering process in Austin so you know what to expect from start to finish.
Knowing what happens during each phase helps you prepare your yard, schedule your project effectively, and protect your investment during the initial curing phase.
What Is Pool Plastering?
Pool plaster is the final waterproof barrier applied over a swimming pool’s concrete or gunite shell. While the underlying concrete gives the pool its structural shape and strength, it is naturally porous and water-permeable. Plaster creates a sealed, watertight coating that holds water inside the pool, protects the concrete structure from chemical corrosion, and provides a comfortable surface for swimmers’ feet.
When working with specialists in Pool Plastering Austin, homeowners can choose from a variety of interior finishes:
- Standard White Plaster: A classic blend of white Portland cement and marble dust that creates a brilliant, light-blue water tone.
- Quartz Aggregate: Standard plaster mixed with colored quartz crystals for added durability, stain resistance, and speckled depth.
- Pebble Finishes: Smooth river pebbles embedded in modified cement for a natural, rustic aesthetic with maximum longevity.
Step-by-Step Breakdown of the Pool Plastering Process
A professional pool resurfacing project requires skilled craftsmanship, precise chemical timing, and meticulous preparation. Here is how the process unfolds from start to finish.
[ Step 1: Draining & Surface Prep ] ──► [ Step 2: Bond Coat Application ] ──► [ Step 3: Plaster Troweling ] ──► [ Step 4: Fill & Hydration Cure ]
Step 1: Draining, Chipping, and Surface Preparation
Before applying fresh material, contractors must properly prep the underlying structure.
- Draining the Pool: Technicians use submersible pumps to empty the water safely, ensuring groundwater hydrostatic relief valves are checked so the pool shell remains stable.
- Undercutting and Chipping: Crews undercut the tile line, skimmer mouths, floor returns, and light niches about 1/4 to 1/2 inch deep. This step ensures the new plaster lays flush with existing fixtures rather than creating sharp, raised edges.
- Removing Compromised Material: Any hollow, delaminated, or flaking old plaster is chipped away using pneumatic hammers to expose a clean, solid substrate.
Step 2: Cleaning and Applying the Bond Coat
Once the shell is prepared, the entire surface is power-washed to remove algae, plaster dust, and chemical residues. Next, workers spray a specialized bond coat—a high-strength polymer-modified cement resin—over the exposed concrete. This textured layer acts like industrial velcro, bonding the new plaster coat permanently to the underlying shell and preventing future delamination.
Step 3: Pumping and Hand-Troweling the Plaster
This is where true craftsmanship takes center stage.
- Mixing and Pumping: Plaster is mixed on-site in specialized rigs to ensure exact consistency before being pumped through a heavy hose directly into the pool basin.
- Hand Application: A skilled crew uses specialized trowels to spread the plaster evenly across the floor, walls, steps, and benches, maintaining a uniform thickness of roughly 3/8 to 1/2 inch.
- Smoothing and Finishing: As the plaster begins to set, masons hand-trowel the surface multiple times to achieve a dense, mirror-smooth finish. For pebble or aggregate finishes, crews perform an additional acid wash or water rinse to expose the decorative stones before the material fully hardens.
Step 4: Filling the Pool immediately
Because pool plaster cures underwater through a chemical hydration process, the pool must be refilled immediately after the plastering crew finishes troweling.
- Hoses are wrapped in clean towels and placed at the bottom of the deep end to prevent water pressure from etching or gouging the soft, fresh plaster.
- Crucial Rule: The water fill must run continuously until it reaches the middle of the waterline tile. Stopping the water midway creates a permanent, visible ring on the new plaster finish.
The Critical 28-Day Curing Phase (Start-Up)
Applying the plaster is only half the battle; proper initial care during the first 28 days determines your new finish’s lifespan, smoothness, and color uniformity. During this curing window, raw plaster leaches calcium into the water, causing water pH and alkalinity levels to rise rapidly.
┌─────────────────────────────────────────────────────────────────────────────┐
│                    THE 28-DAY PLASTER CURING CHECKLIST                      │
├──────────────────────────────┬──────────────────────────────────────────────┤
│ Daily Task                   │ Purpose & Best Practices                     │
├──────────────────────────────┼──────────────────────────────────────────────┤
│ **Twice-Daily Brushing**     │ Brushes away loose plaster dust ("plaster    │
│                              │ bloom") to prevent surface scaling.          │
├──────────────────────────────┼──────────────────────────────────────────────┤
│ **Chemical Balancing**       │ Keep pH (7.2-7.6) and Alkalinity (80-100 ppm) │
│                              │ tightly controlled to prevent etching.       │
├──────────────────────────────┼──────────────────────────────────────────────┤
│ **Equipment Precautions**    │ Keep automatic pool cleaners OFF for 14 days │
│                              │ to avoid scratching soft new surfaces.       │
└──────────────────────────────┴──────────────────────────────────────────────┘
- Brush Daily: Brush the entire pool surface (walls, floors, and steps) at least twice a day for the first two weeks. This prevents loose plaster dust from settling and hardening onto the surface.
- Monitor Water Chemistry: Test and balance pH, total alkalinity, and calcium hardness daily. Keep chlorine levels low during the initial days as recommended by your installer.
- Delay Automatic Cleaners: Avoid running wheeled automatic pool vacuums, salt-chlorine generators, or pool heaters during the first 14 days to prevent wheel tracks or premature scaling on delicate plaster.
Conclusion
Understanding the pool plastering process transforms what seems like a complex renovation into a clear, manageable home improvement project. From thorough surface preparation and expert hand-troweling to diligent post-fill chemical management, every phase plays a critical role in delivering a durable, watertight, and visually stunning finish.
If your pool is showing signs of wear or you are ready to upgrade your backyard aesthetic, trust the local experts at Clear Solutions Pool Plastering. Their experienced team guides Austin homeowners through every step of the process, ensuring exceptional craftsmanship and lasting results for years of summer enjoyment.
Frequently Asked Questions (FAQ)
Q: How long does the physical pool plastering process take?
A: The actual application of the plaster takes just one day (typically 4 to 8 hours depending on pool size). However, surface prep, bond coat application, and pool filling add an additional 2 to 4 days to the overall timeline.
Q: How often does a swimming pool need to be replastered?
A: Standard white plaster typically lasts 7 to 10 years, quartz aggregate finishes last 10 to 15 years, and high-end pebble finishes can easily last 15 to 20+ years with proper water chemistry management.
Q: Can I use my pool heater right after replastering?
A: No. You should wait at least 14 days before turning on a gas or electric pool heater. Heating the water too early accelerates curing unevenly and can cause plaster discoloration or calcium scaling.